– OVERVIEW
Understanding facial features is KEY for any artist looking to become a character artist. This kind of practice is a great way to enhance your skills of anatomy, texture, and realism skills. In this exercise, rather than drawing a generic, standard eye, nose, mouth, and ear, you will be drawing YOUR facial features. So take a reference photo of each feature and try and get a good shot of each that captures the detail to the best of your ability. You can learn a lot from using yourself as reference and this practice gets you in the habit of using yourself as the subject matter when you need it. Especially moving forward doing anatomy studies, always remember that you are a walking reference that can be used at any time. You can download the practice sheet BUT remember that the examples are NOT meant to be used for your drawings but rather as placeholders. And if you're doing this exercise traditionally, be sure to scan and upload the finished results in each slot before uploading!
-
Your Eye - The most well known facial feature that artists typically enjoy drawing are the eyes. To capture the "windows to the soul", really observe where the skin and the actual eyeball meet. Save the finer details like the eyelashes for last, you wanna build up the values around them first. You should also include the eyebrow and notice where the skin peeks through.
-
Your Nose - The center of the face, the feature that can define a face and give personality. This may be considered the "easier" feature of the 4 but that doesn't mean it should be overlooked. Be sure to add values where appropriate and push the bridge and bottom of the nose forward to give it dimension. The highlights also need to be placed accordingly and should be minimal at most! Add any pores or texture here to achieve a deeper level of realistic detail.
-
Your Mouth - The mouth can be tricky, especially when adding value without looking like lipstick or gloss. Don't skip on adding values though, instead focus on placement and REALLY focus on the wrinkles of the lips and the texture on the surface. The wrinkles are not just straight lines going down vertically, there are lines that also go horizontal as well. While the middle lip line is pretty dark and defined, the upper and lower line are softer and have less definition. Also challenge yourself to include the area around the mouth such as the pores and hair if you have visible examples!
-
Your Ear - Ears are fun once you can break it down into the different shapes it's composed of. Use the Reference examples further below to help out! The placement of values should create believable form so be sure to pay attention to the inner workings and shapes you see. The darkest area is in the bottom pocket of the ear where the sound eventually leads into the head.
Below is the practice worksheet that you can grab from the “Downloads” tab (find it under the header image near the top of this exercise). 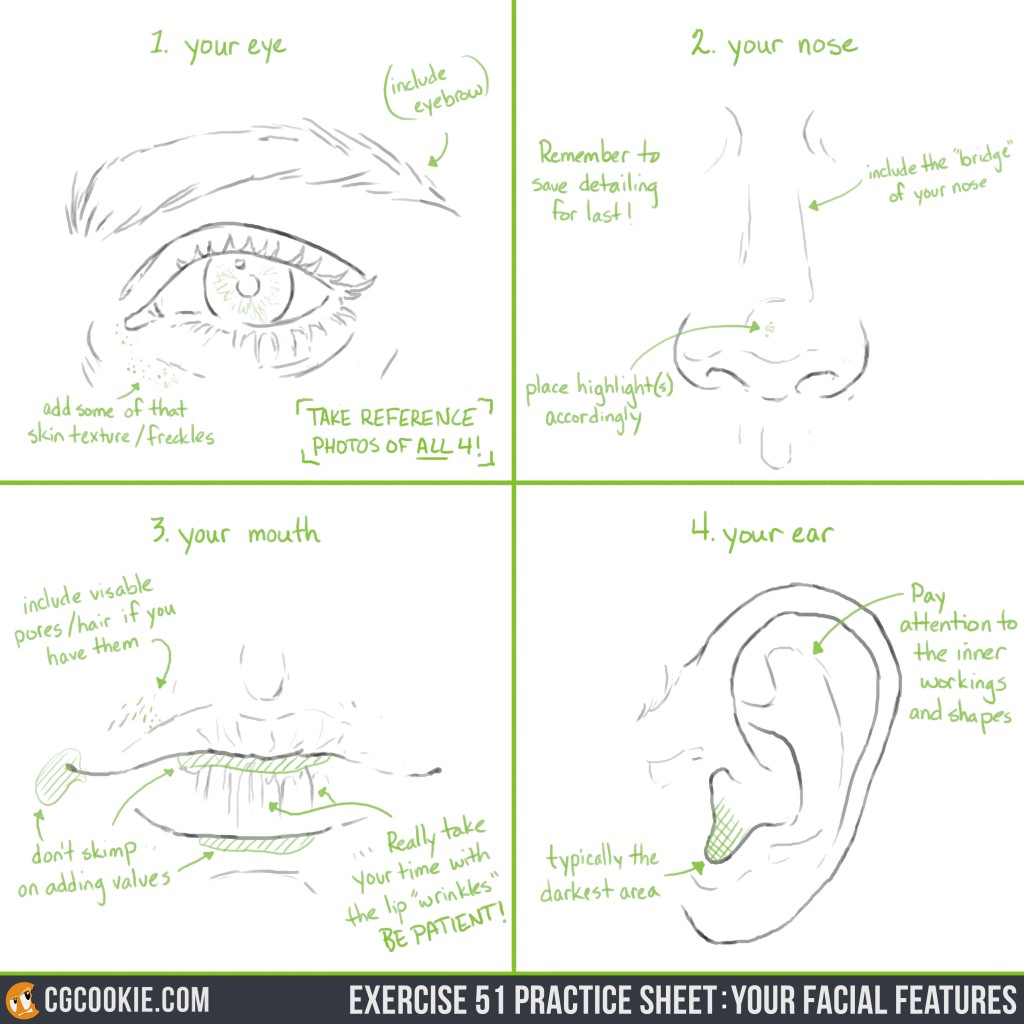
– TIPS
- USE YOU OWN REFERENCE! Take a photo of each of your own facial features including the eye, nose, mouth, and ear!
- Don't just rely on auto-pilot to take over, push yourself to capture the features better than you could before.
- Value placement is so important so be attentive to where the values lie in the reference and capture them in your recreations.
- Save details for last. This includes highlights, pores, eyelashes, freckles, hairs, etc.
This exercise is a great observational practice and if you would like to see some further tips and suggestions, check out our facial reference packs below! [gallery columns="4" link="file" ids="231835,231834,231833,231832"]
– INSTRUCTOR NOTES –
Below were the final results from my exercise. There is a full step by step on how to create each here: https://cgcookie.com/course/facial-features/ 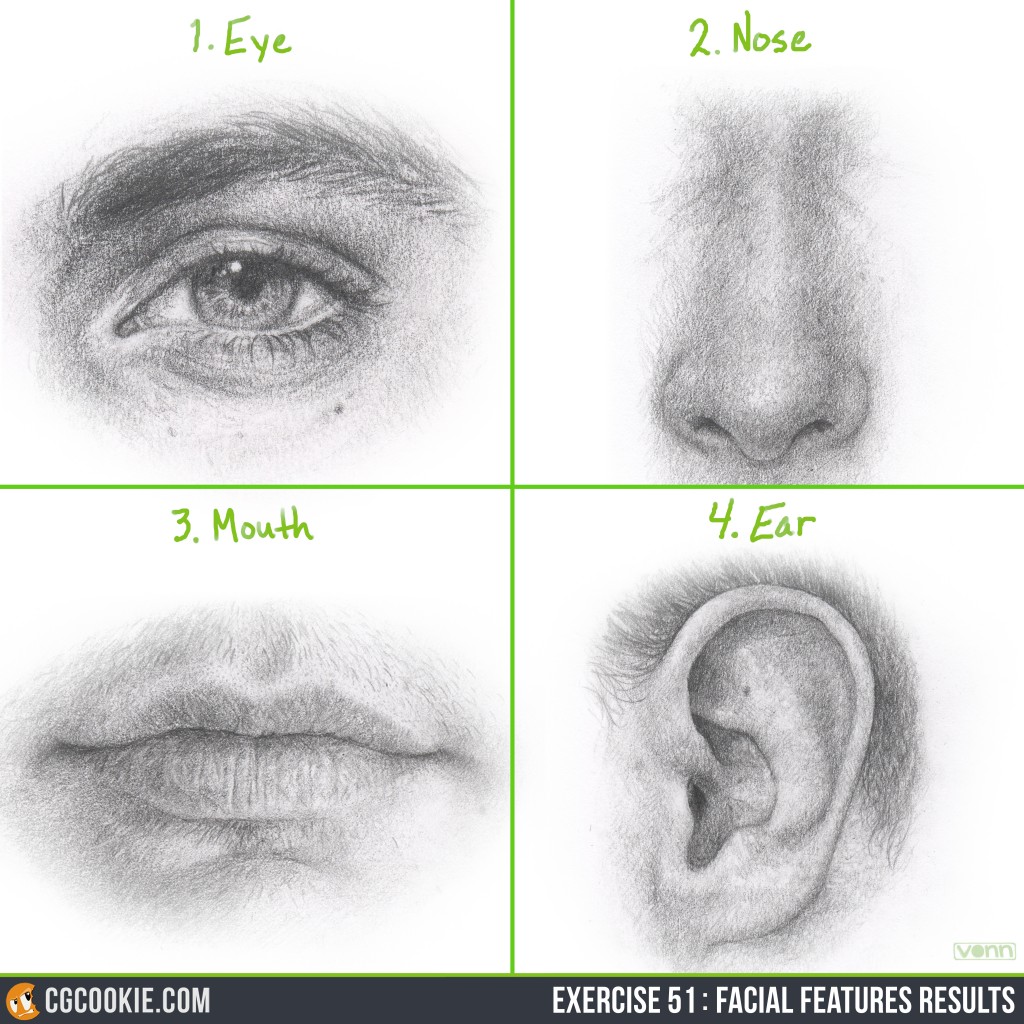 When you finish the exercise, remember to submit the result to the “Submissions” tab near the top of this exercise. You can see other submissions alongside your own!


 When you finish the exercise, remember to submit the result to the “Submissions” tab near the top of this exercise. You can see other submissions alongside your own!